This tutorial is applicable to Debian, Kubuntu, Ubuntu and other Debian-based GNU/Linux distros such as Linux Mint. It deals with encryption of the additional partitions and drives after the operating system is installed using passwords (it does not deal with encryption of the partitions done during installation of the operating system). It can be useful, for example, for creation of encrypted backups of important data on separate internal or external hard disk drives or flash drives. All necessary actions are shown for KDE’s Plasma Desktop and for command-line interface (CLI).
Step 1. Prepare the drive before encryption (select correct drive and partition, create partition table if needed, create unformatted partition)
Before encrypting any hard disk drive or flash drive it is necessary to make sure that you are going to encrypt the right partition on the right drive (i.e. NOT the ones where operating system is installed (e.g. / and /home) and where encryption should have already been done during installation of the operating system – encrypting the wrong partition will destroy all the data on it).
If you use KDE’s Plasma Desktop you can view all the drives with all their partitions easily with Partition Manager as shown on the snapshots below:
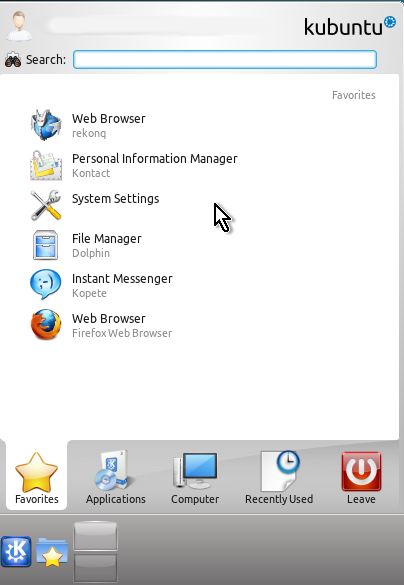
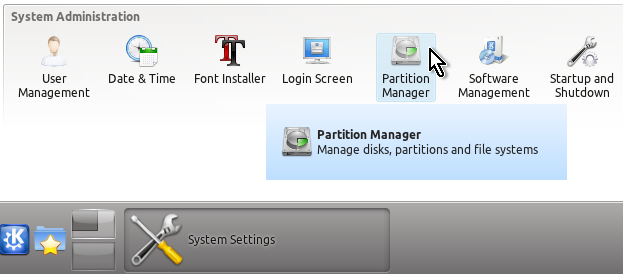
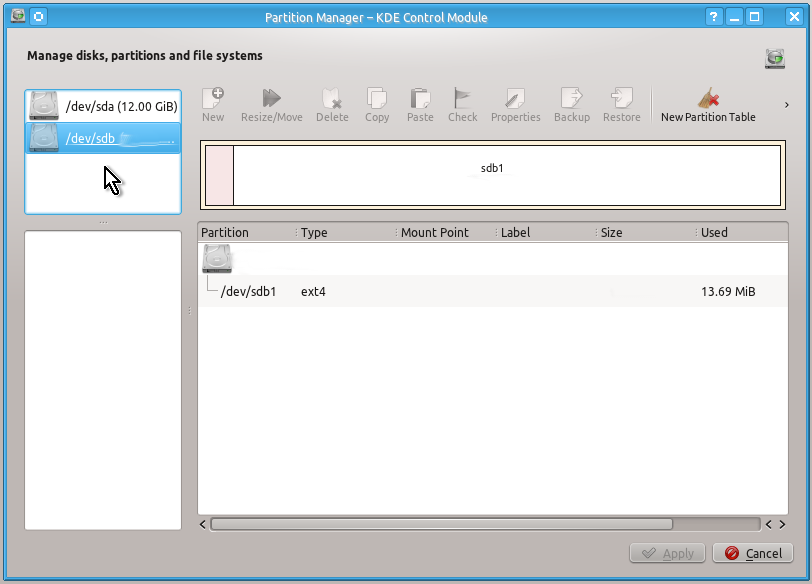
If you do not see Partition Manager in System Settings you should install partitionmanager package via KPackageKit or via command line:
sudo apt-get install partitionmanagerYou can also view your drives and partitions on them in CLI using parted command as follows:
sudo parted --listFor example, you want to encrypt the whole second (new, additional) hard disk drive or flash drive, which is shown e.g. as /dev/sdb. Then you need to create one unformatted partition on it, namely: /dev/sdb1
Again, it is very easy to create a partition table (if needed) and unformatted partition using KDE Partition Manager.
You may not need to create a partition table (since it will already exist e.g. on a flash drive) but for the sake of example here are the snapshots of actions to be done to create it:
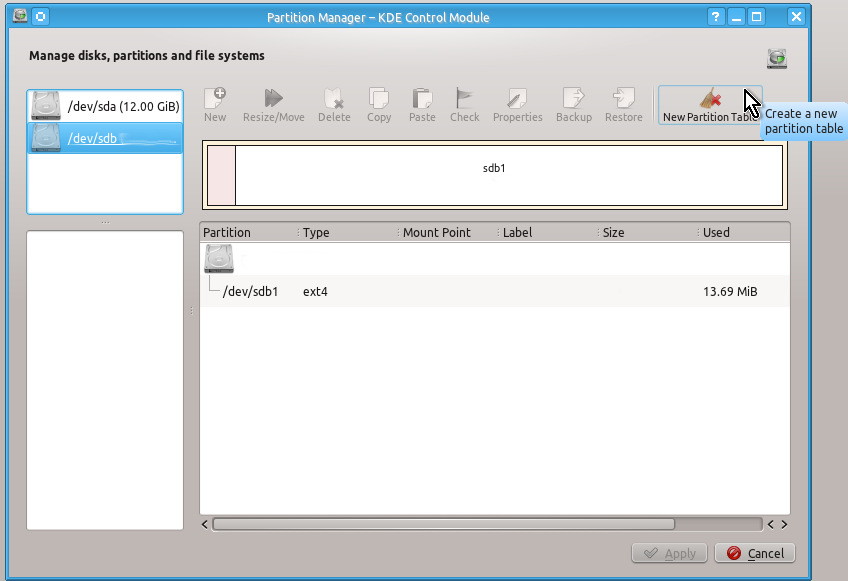

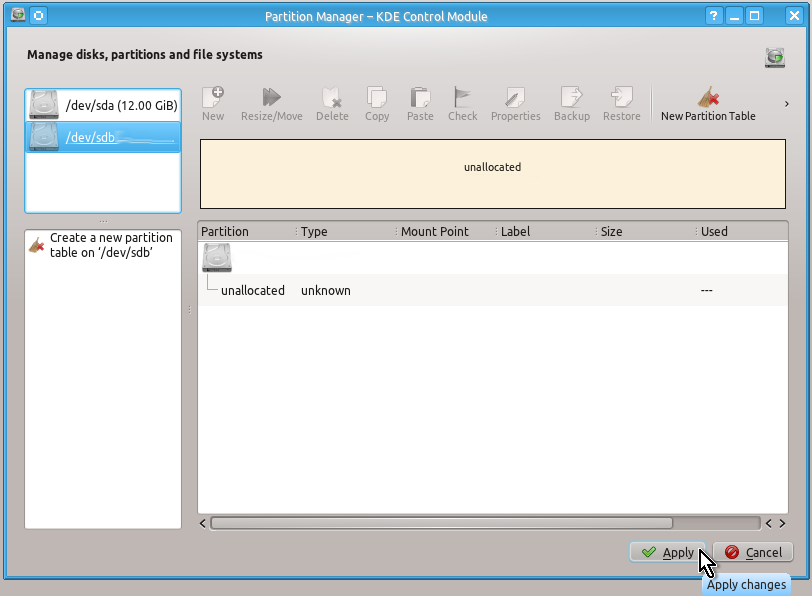
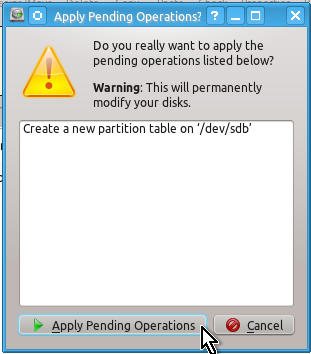
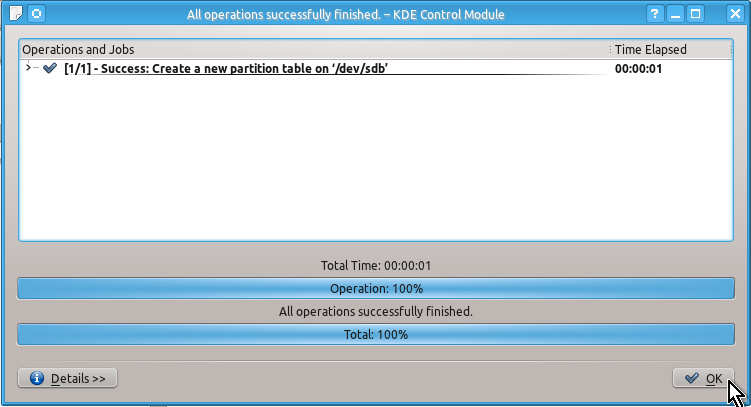
Unlike a partition table you will definitely need to create an unformatted partition on your drive by doing the actions shown on the snapshots below:
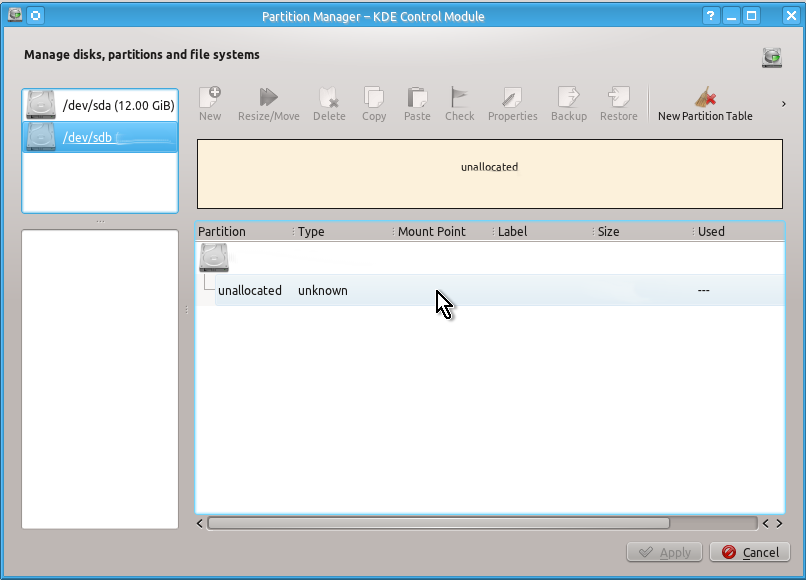
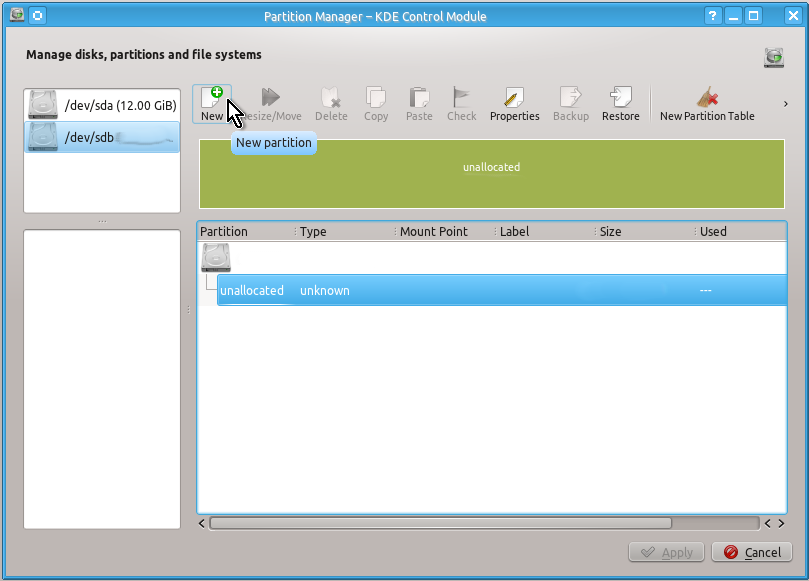
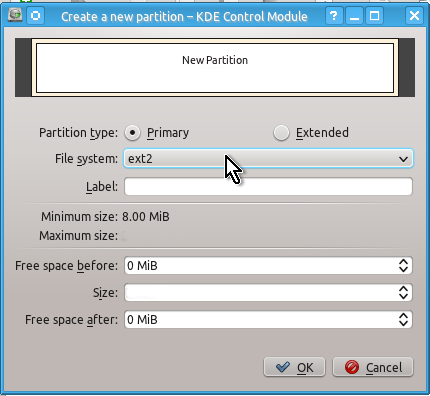
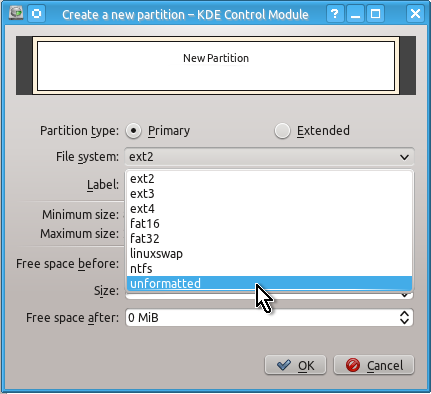
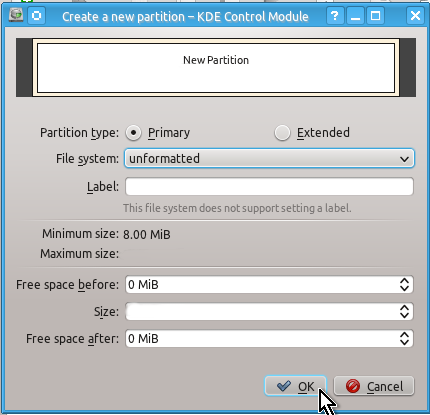
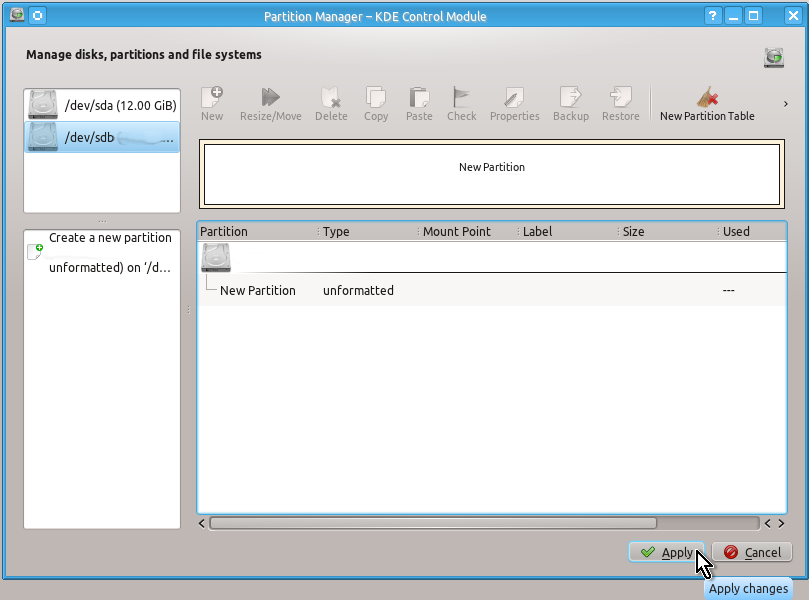
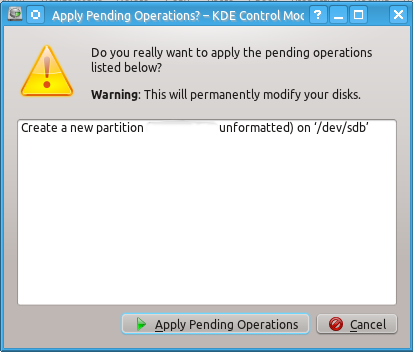
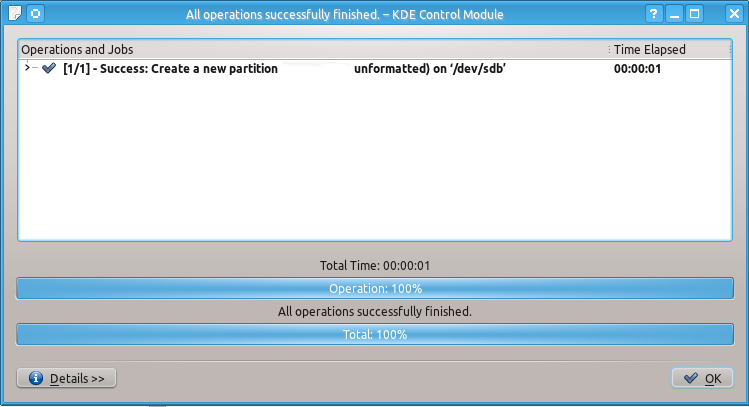
When this is done you can check that you indeed have created unformatted partition as follows:
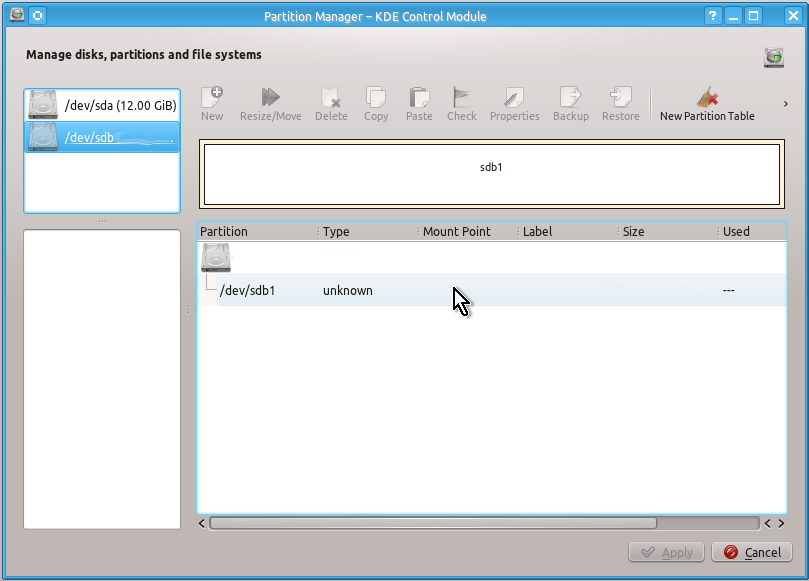
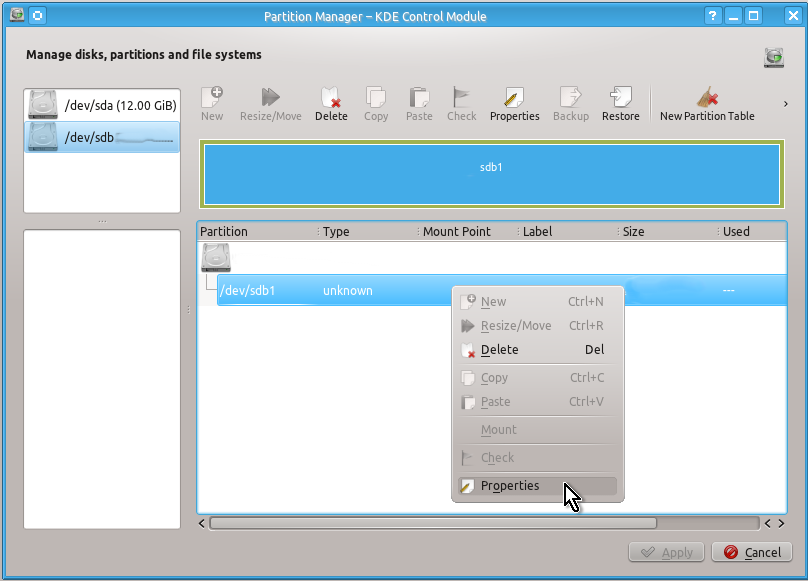
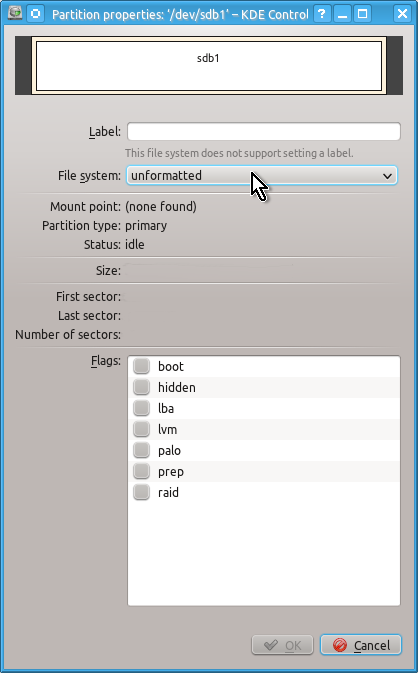
You can close Partition Manager’s windows now and go to the step 2 below.
If you need to create a partition table in CLI you can use fdisk command as follows:
sudo fdisk -cu /dev/sdb
(type w and press Enter when asked for command)
Unformatted partition can be created in CLI using cfdisk command as follows:
sudo cfdisk /dev/sdb
(then use text menu that appears at the bottom)
Step 2. Encrypt physical unformatted partition
Here you will have to use CLI, choose among the four strongest freely available ciphers and change some options as you need:
a) AES cipher
sudo cryptsetup --verbose --verify-passphrase luksFormat /dev/sdb1 --cipher aes-cbc-essiv:sha256 --key-size 256 --hash sha512 --iter-time 5000sudo cryptsetup --verbose --verify-passphrase luksFormat /dev/sdb1 --cipher camellia-cbc-essiv:sha256 --key-size 256 --hash sha512 --iter-time 5000sudo cryptsetup --verbose --verify-passphrase luksFormat /dev/sdb1 --cipher twofish-cbc-essiv:sha256 --key-size 256 --hash sha512 --iter-time 5000sudo cryptsetup --verbose --verify-passphrase luksFormat /dev/sdb1 --cipher serpent-cbc-essiv:sha256 --key-size 256 --hash sha512 --iter-time 5000After you select the cipher you may also want to change iter-time option, which shows (in milliseconds) for how long cryptsetup program will wait after you type the password before decrypting this encrypted partition. In the example commands above this time equals 5 seconds (5 thousand milliseconds), which is a reasonable tradeoff between security and convenience.
After you issue one of the above commands the following message should appear in CLI:
WARNING!

========

This will overwrite data on /dev/sdb1 irrevocably.

Are you sure? (Type uppercase yes):
Now you should type YES and press Enter.
Enter LUKS passphrase:

Verify passphrase:
Now you should type the password for encrypting the partition and press Enter, then type this password again and press Enter again. Create and use only strong passwords (i.e. about 20 characters long, which contain upper-case and lower-case letters, numbers and special symbols like # and &) since using weak passwords (e.g. dictionary words or information associated with you like your address, phone number, date of birth, etc.) will allow the bad guys to break this encryption easily despite using the strongest ciphers.
Command successful.After you see this message the physical partition (in our case /dev/sdb1) is sussessfully encrypted and you need to do the next step.
Step 3. Create (open) logical partition in /dev/mapper/
Issue the following command (the name “secret_disk” here is used only as an example – you can use any other name if you want for your encrypted partition or, of course, you can use this example name as well):
sudo cryptsetup luksOpen /dev/sdb1 secret_diskYou will see the following text and will need to type your password for the encrypted partition that you created in step 2 above and press Enter:
Enter passphrase for /dev/sdb1:After this is done you will have two related partitions as follows:
a) physical partition will be /dev/sdb1
b) logical partition will be /dev/mapper/secret_disk
Step 4. Create filesystem on logical partition in /dev/mapper/
Now you need to create a filesystem on the logical partition prepared in step 3 above. Issue the following command to create ext4 filesystem on the “secret_disk”. Again, “secret_disk” here is used only as an example – you must use here the name that was chosen by you in step 3 above. As for the filesystem type, of course, you can use something other than ext4 if needed.
sudo mkfs -V -t ext4 -v /dev/mapper/secret_diskAfter filesystem is created proceed to step 5 below.
Step 5. Close logical partition, restart device, change ownership and rejoice
Use the name chosen by you for the logical partition in /dev/mapper/ in step 3 above instead of “secret_disk” and issue the following command:
sudo cryptsetup luksClose secret_diskNow restart your encrypted device (disconnect and connect again your flash drive or reboot your computer if you encrypted hard disk drive) and you should see in Dolphin file manager your encrypted device called Encrypted Container:
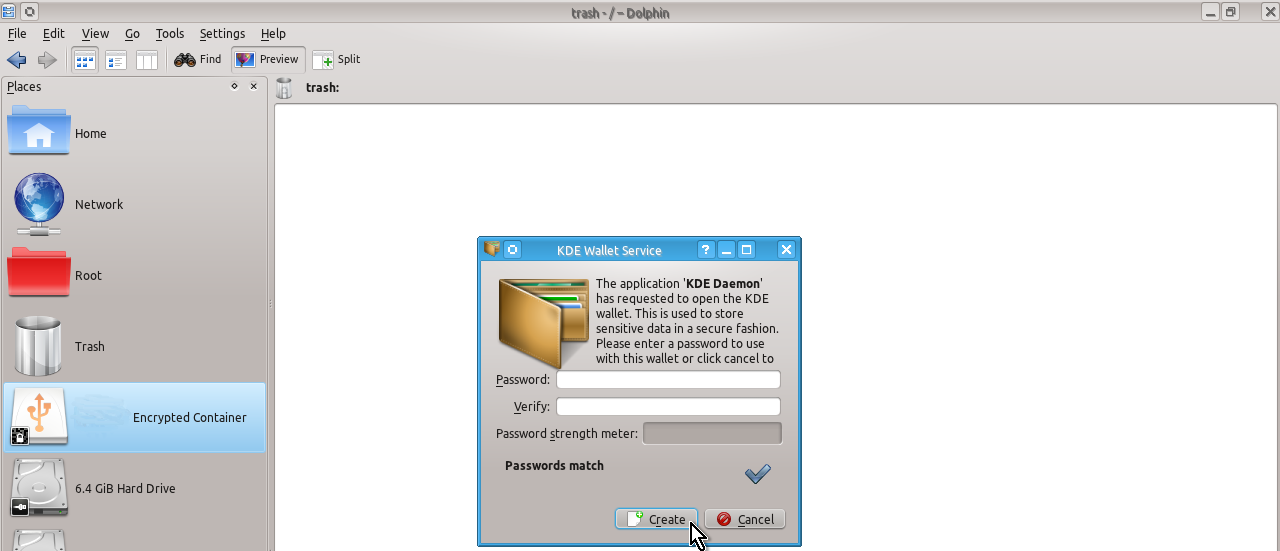
You can use KDE Wallet Service to store your password for you (in this case you need to create a new additional password for KDE Wallet Service, type it twice and press Create button) or you can additionally install and use other more advanced programs to safely store your passwords such as KeePassX (in this case press Cancel button and you will see the next window as shown below).
After you see the small window asking you to enter a password for the Encrypted Container as shown on the snapshot below, type the password created in step 2 above, press OK and you will be able to use your encrypted device:
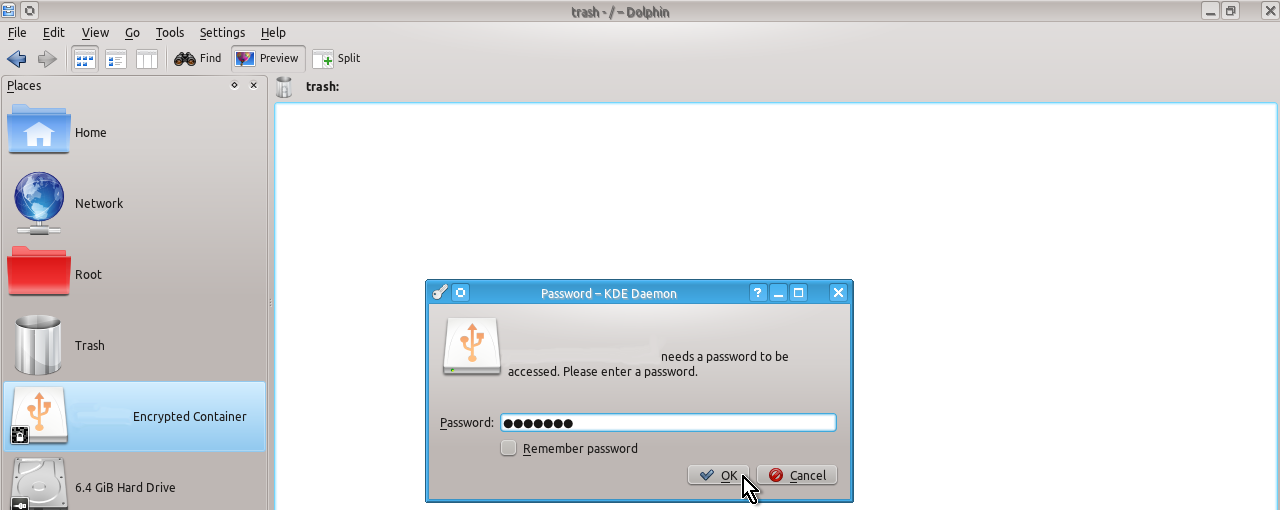
If you do not see any Encrypted Containers then you most probably have an outdated KDE’s Plasma Desktop and you need either upgrade it to the current version or use CLI to open your encrypted device as follows:
sudo cryptsetup luksOpen /dev/sdb1 secret_diskThis Encrypted Container was created using root privileges and so you need to change them to your normal user before you can use it normally (i.e. you need to change the ownership of the folder, which represents your encrypted device in /media/).
If you use KDE’s Plasma Desktop you should do the following:
Press Alt + F2 (Alt and F2), type kdesudo dolphin into the small horizontal window that appears and press Enter.


You will be asked for your regular user password and after you type it and press Enter you will be using Dolphin file manager with root privileges (temporarily).
Click on your Encrypted Container on the places panel and, after the device opens, click on media at the top of the Dolphin’s window.

You will see the contents of the folder /media/ where one of the folders has a strange long name consisting of random numbers and letters – this is what you need (of course, the name that you can see on the snapshot below is only an example and the name in your case will be different).

Click on this folder with the right mouse button and select Properties at the bottom of the drop-down menu.
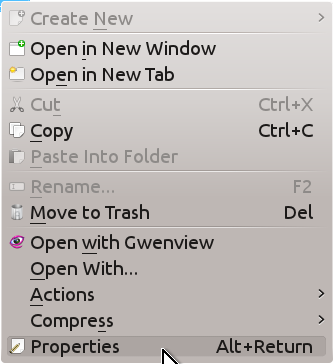
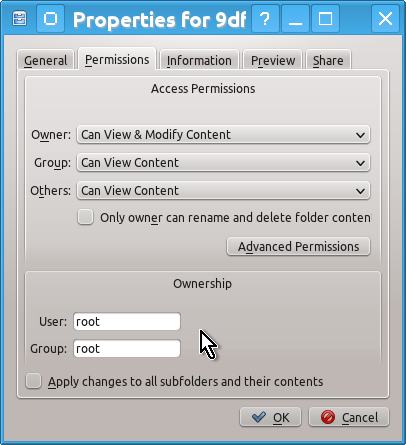
Select Permissions tab in the Properties window that opens and change the ownership for User and Group from root to your regular user as well as check the box Apply changes to all subfolders and their contents and press OK.
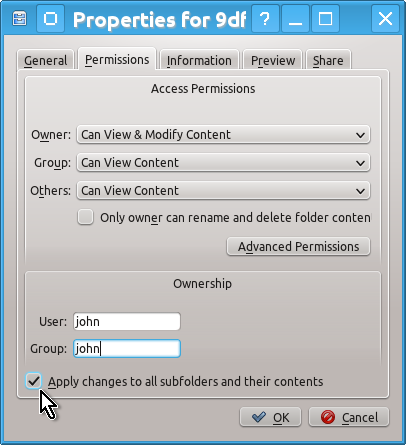
That is all – you can use your encrypted device as a regular user now.
If you use CLI then you need to issue the following commands to change the ownership (replace OWNER with the regular user name, noting that there must be a : (colon) after it and replace FILE with that strange long name consisting of random numbers and letters – use copy and paste to avoid errors):
cd /media
ls
sudo chown --recursive --verbose OWNER: FILE

